Friday, February 28, 2014

Elwood Colors n Cups- Night 2!

Last night was the second painting evening for the wonderful teachers of Elwood Community Schools!  We had several ladies from Tuesday's class come back and paint with me on Thursday!!!

The painting that they chose was the Fall Trees.  I think all of us were drooling over the gorgeous teal and orangy/yellow!

I love the quietness that falls over the group as they are focusing on their paintings...


...and the excited chatter at the end as they are all gushing over each other's work!!!  Great job, ladies!!! I had a blast, and can't wait to paint with you next year!!!
Thank you! :D

Wednesday, February 26, 2014

Elwood Colors and Cups!

For the 3rd year in a row, Elwood Community Schools has invited me to do a Colors n Cups party with their teachers!!!

Last night we painted Dandelions together, and had a blast!!! All of the paintings were gorgeous!!!
Even from painting the background, each painting became unique.  I love to see that :)


Deb Durm is the one who coordinates all of this each year, and does such a fantastic job!!! 
Last night, she even created a poem to go with her painting!!!

The Dandelion

White sweet nothings, 
Float above the grass, 
Propelled by the wind,
Or better still the sweet puff
Of a child's breath,
Fist crushing the green stem,
Eyes closed in concentration,
Doing his part to complete,
The cycle of the green.

-Deb Durm

So beautiful!  Deb is on the front row, third in from the right! 
Thank you, ladies!  See you again on Thursday! :D

Monday, January 20, 2014

Instagrams

Here's just a few shots of what I've been up to lately!

I LOVE my studio!
Sketching before using my new Prismacolor markers!!!!
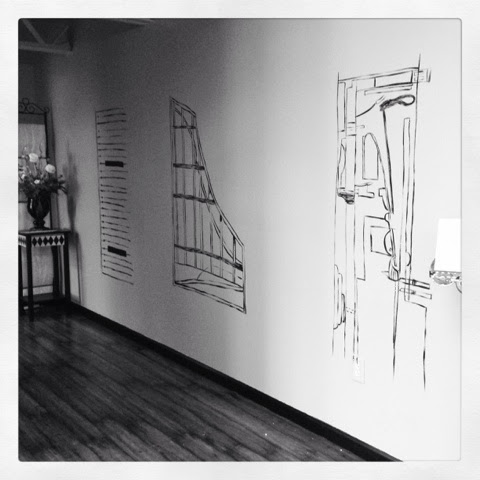
Mural in my friend, Courtney's, piano studio.  The evolution of the piano!
Still loving my planner!!! The organization, and the transformation! :)


Saturday, January 18, 2014

Pillow Time


A few years ago when my Father-in-law moved into his new home, he gave me a ton of vintage fabric that had been left behind!!!  I have been hanging on to them for the perfect project, and have really started using them a lot recently!!!

I really wanted to make a cute little pillow to add to the toy room, so I dug into my stash, and found this two little beauties...and some puffy ball trim...of course! :)
I put my fabrics right sides together, and then added the trim.  I'm not gonna lie, it took me a minute to remember that those little balls needed to face the inside so that they would be on the outside when I turned the fabric!!!  Lol, Mom brain!
Once they were pinned in, just a few zips of the sewing machine...
and a little stuffing!!!  I had this stuffing laying around from a previous project.  I didn't fill my pillow supper full, but firm enough that it would be comfy for tiny heads to lay on.
And, ta-da!!!!
The floral side is really my favorite.  I love all the pinks on it!!!  This project took me about 20-30 minutes.  It was quick and easy, and I love the odd shaped pillow in the room!!!  So, go make yourself a little  happy to lay your head on!

Monday, January 13, 2014

DIY Memory Game


My nephew just turned 3, and I really wanted to make him something fun, entertaining, and personal. 

Although my own childhood was slightly tainted by The Memory Game, because my older sister, who must have learned how to quickly figure out all of the cards...I'm still not exactly sure how she did it...beat me Every. Single. Time. I thought I might as well give the next generation a shot :)  So, here's what you'll need:

1. Instagram photos, or wallet size photos-2 of each picture. Click HERE to learn how to print your Instagrams!
2. Scrapbook paper
3. Matte board (I got mine at Hobby Lobby)
4. Ruler
5. Exacto Knife
6. Glue stick
7. Double sided adhesive tape- Big A suggested carpet tape for me!

*Just a little tip: Choose a simple, but fun pattern for your paper that won't make their eyes all crazy when the pieces are laying face down.  I was going to do a cute white paper with little black mustaches on it for Pax's game, until I realized I was getting a headache from looking at it! lol

Now, let's get started!
Cut out your photos, and then your Scrapbook paper to fit the size of the photos.  My Instagram prints ended up being 2.5 in.x 2.5 in. 

Next, cut your matte board.  On a cutting surface, like my cutting matte that I use for sewing, I measured and marked the matte board, and then whipped out my Exacto knife that hasn't seen much use since my college days.  Keep your ruler on your pencil line as a guide for your knife, otherwise your knife WILL run off the line! Those things have a mind of their own, and let's face it, you don't need to add blood to this project :)
Once all of your pieces are cut out, use your glue stick to glue your scrapbooking paper to one side of your matte board.
Next is where the heavy duty part comes in. I considered many ways to adhere the photos to the board so they wouldn't come off.  I was dealing with a "Board Book Destroyer," So I knew these bad boys had to be stuck on here for good!!!  Big A suggested Carpet tape.  (I really think he just wanted to go to Lowes and save himself from a trip to Hobby Lobby... :)  I will say, he made a good choice!  That stuff is sticky!!!
It took 2 strips to fill the area of the card, and a lot of cleaning goup off of my scissors :)
And, wha-la!  The pictures are holding on nicely to the matte board, and the game looks awesome!!!
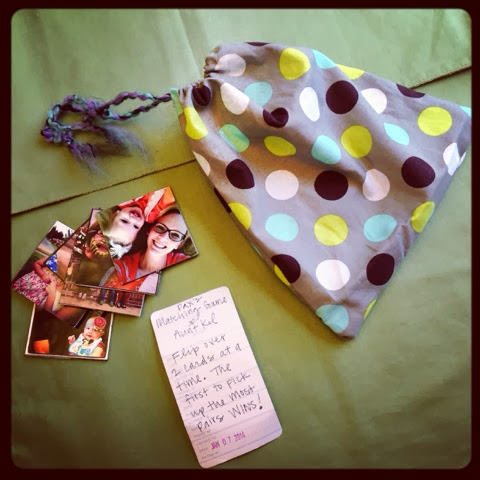
So, while getting ready for his party, I realized that I didn't have a box for his game, so I improvised, and whipped up a little bag for him from some extra fabric and yarn, and made a little instruction sheet!!!
This is a fun game to make for your toddler, especially to include photos of family members who live far away, or just fun, silly ones of your own family!!!  Enjoy!

Monday, January 6, 2014

New Year, New Goals

Happy New Year!!!  I'm usually not big on New Years Resolutions, mostly because my track record for following through with them is, well, not so great :)

I do, however, have a few projects that I'm pretty excited about!!!  The first one is this:
That's right, a planner!!! ...and appropriately labeled if you've been to our house :)  I decided that between doing school with T-Man, my Colors n Cups parties, murals, and just daily family life (not to mention the fact that my brain is completely not able to hold a thought longer than 3 seconds after having kids), I really needed to be organized!

And, of course, I had to make it fun!...and cute...and totally creative...with washi tape :)
I LOVE looking at my calendar, granted we're only 5 days into the year, but whatev!!!!  I've had a great time marking things off my lists, and being able to plan everything out!!!
I'll be posting my planner on Instagram under #diyplanner if you want to keep up!

My other little project, is to try to paint a little more.  I recently found the Daily Paintworks site, which gives you a weekly prompt.  I decided that I would really like to get back into just painting...not so much my mixed media stuff, but more just regular painting.  I haven't done a lot of strictly painting since college, so I thought this would be a fun challenge for me!

I started today with the Summer challenge.  Instead of painting the suggested picture, I decided on using my own photo instead- one of Tucker on the beach at Destin this summer.
It's not my absolute favorite by any means, but it was a good start to the project.  And, you'll see a theme with me that I most likely will not be painting faces :)

What are some of your goals?!

Monday, December 16, 2013

It all started with a bow...

Dresses.
Christmas dresses.
For 3 precious girls.

Like I said, it all started with a bow.  Oh, but such a glorious bow!!! Do you see it below?! Of course you do!!! That's sort of the point, I guess!!!  When I found this at a friend's garage sale, I knew it had to be Liv's. I also knew it would need a dress.
So, there the bow sat in my studio for weeks.  I would occasionally pick through my vintage fabric and lay a few swatches next to it until my creativity and motivation was sparked! :D

The red and white candy cane striped fabric was sort of a given for me, and pairing it with that bright Christmas green...oh, be still my heart!!!

Slowly it began coming together in my mind.  A Bubble dress.  Yes,  bubble dress for my Livie Lu. Oh, how precious this was going to be! So, off to my sewing machine I went!!!!
Zip, slide with my rotary cutter!  Swoooosh with my sewing machine!!! Pin, pin that adorable little ruffle!!! It was just about done...

"Ring, Ring!"  What?!  Miss Story needed a Christmas dress, too?!  Truth be told, I will never be able to tell her No.  (Don't tell her that, though ;)  So, plans of a second dress flooded my mind!

"Ring, Ring!"  Does Ainsley need a Christmas dress, too?!  Oh, 3 tiny cousins in matching dresses?!?!  How can so much cuteness be so close?!!!!
See?! I do not lie!!!  Seriously!!!  These girls are doll babies.  DOLL BABIES, I tell you!!!  Ainsley, in her tiny little mouse voice, thanked me so preciously for her new dress.  Story looked like she had come straight out of The Sound of Music, and Livie, well, no one noticed her dress over her bow ;) atehehehe

I had so much fun making these adorable little frocks for my little ladies, all of whom I want to steal from their Mommies and keep at my house :D, and I love the memory of going to see Santa with them all dolled up together!!!!

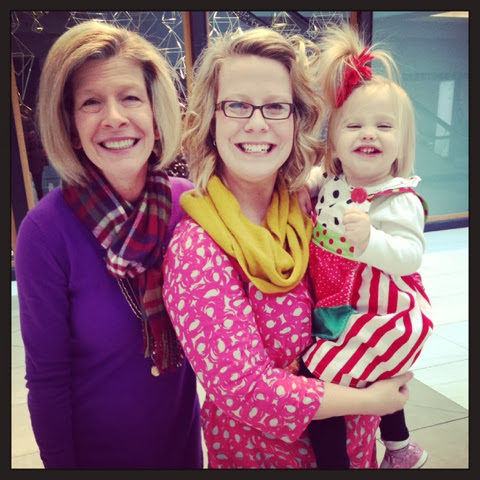
Story was so thrilled for a little sucker treat, and you can see part of her apron on the front of her dress in this picture.

Below is a pic of Ains in Bible Study.  As I came down from dropping off T-Man, I saw her quietly sitting in a rocking chair reading a book and looking as sweet as can be!!!
Thank you to my sisters who let me dress up their "baby dolls!" I know that the dresses were not perfect, did I mention that I made these about 2 days before we needed them?! lol!!!!  However, I would never let your confidence in sewing deter you from attempting something new!!!

I did not use a pattern on any of these dresses.  I laid one of Liv's shirts out to measure size, and then just did my own thing from there!!!  It doesn't have to be perfect, just have fun! :D