Monday, December 16, 2013

It all started with a bow...

Dresses.
Christmas dresses.
For 3 precious girls.

Like I said, it all started with a bow.  Oh, but such a glorious bow!!! Do you see it below?! Of course you do!!! That's sort of the point, I guess!!!  When I found this at a friend's garage sale, I knew it had to be Liv's. I also knew it would need a dress.
So, there the bow sat in my studio for weeks.  I would occasionally pick through my vintage fabric and lay a few swatches next to it until my creativity and motivation was sparked! :D

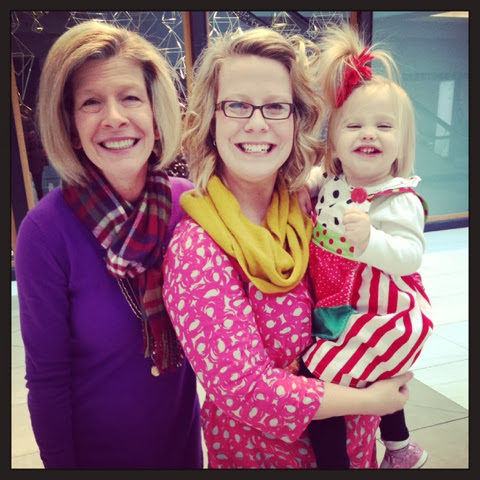
The red and white candy cane striped fabric was sort of a given for me, and pairing it with that bright Christmas green...oh, be still my heart!!!

Slowly it began coming together in my mind.  A Bubble dress.  Yes,  bubble dress for my Livie Lu. Oh, how precious this was going to be! So, off to my sewing machine I went!!!!
Zip, slide with my rotary cutter!  Swoooosh with my sewing machine!!! Pin, pin that adorable little ruffle!!! It was just about done...

"Ring, Ring!"  What?!  Miss Story needed a Christmas dress, too?!  Truth be told, I will never be able to tell her No.  (Don't tell her that, though ;)  So, plans of a second dress flooded my mind!

"Ring, Ring!"  Does Ainsley need a Christmas dress, too?!  Oh, 3 tiny cousins in matching dresses?!?!  How can so much cuteness be so close?!!!!
See?! I do not lie!!!  Seriously!!!  These girls are doll babies.  DOLL BABIES, I tell you!!!  Ainsley, in her tiny little mouse voice, thanked me so preciously for her new dress.  Story looked like she had come straight out of The Sound of Music, and Livie, well, no one noticed her dress over her bow ;) atehehehe

I had so much fun making these adorable little frocks for my little ladies, all of whom I want to steal from their Mommies and keep at my house :D, and I love the memory of going to see Santa with them all dolled up together!!!!

Story was so thrilled for a little sucker treat, and you can see part of her apron on the front of her dress in this picture.

Below is a pic of Ains in Bible Study.  As I came down from dropping off T-Man, I saw her quietly sitting in a rocking chair reading a book and looking as sweet as can be!!!
Thank you to my sisters who let me dress up their "baby dolls!" I know that the dresses were not perfect, did I mention that I made these about 2 days before we needed them?! lol!!!!  However, I would never let your confidence in sewing deter you from attempting something new!!!

I did not use a pattern on any of these dresses.  I laid one of Liv's shirts out to measure size, and then just did my own thing from there!!!  It doesn't have to be perfect, just have fun! :D

Wednesday, November 13, 2013

Postcards


A few weeks back, I saw that iHanna had her Postcard Swap going on!!! The idea sounded fun to me, but, still, I didn't sign up.  Finally, when inspiration hit, I went to work!  I checked out a few details, and saw that I would need to create 10 postcards!

With little to no idea in mind, I went to work!  I began with 3 sheets of 9x12 watercolor paper.  I picked my color pallet, and just started painting.  Working on the 3 different papers gave me freedom to move around a bit.

I layered some of my "special papers" on top of the paint, including some gorgeous silver/gold handmade paper wrappings from Anthropologie...a total fav of mine!!!
 Once I was done, I cut each page into 4 pieces, creating my 12 postcards (leaving 2 extras!!!!- one for me, and one to most likely send to my mom!)
 I then moved on to my next step.  I knew from the beginning that I was going sew on these cards. I love the feel of the texture, and the interest that it adds to the layers!!!
 I continued sewing these today.  I needed a relaxing place to just think, let my mind wander, and my sewing machine just happened to be the spot!!!!
 I loved guiding the paper aimlessly through the machine and seeing the beautiful outcome of the stitched thread.  It really was exactly what I needed for my thoughts to wander free.  No rules. No stress. Just creating.


*And, in true Kel fashion, I didn't read all of the requirements for the Postcard Swap until the beginning stages of the sewing.  Turns out that I missed the deadline for the project by a DAY!!!  lol!!!  But, no worries!!! These beauts will be saved for her next swap in 6 months...or used in one of my journals if I can't wait that long! ;)


Monday, November 4, 2013

Thankful Tree 2013

Happy November!  Oh, how I love this time of year!!!  Since we've moved into our new house, my joy for the gorgeous fall leaves has multiplied, as our home is nestled right in among them!!!  It is a GORGEOUS site as we look out every window of our house!

Along with November comes our Thankful Tree!!! I have been anxiously awaiting November 1st to start this project with T-Man, especially since he's now 3 and will be able to understand this concept a bit more than last year!  Thankfulness, however, is still a difficult concept to explain!

Alright, onto our Thankful Tree!  If you'd like to create your own tree, here's what you'll need!
*Brown butcher paper-I got mine at the Dollar Tree!
*Leaves- I also bought mine from the Dollar Tree, but if your kids are older, they might enjoy cutting their own out of construction paper!
*Brown paint-I used washable paint since he was painting on our new floors :)
*Masking or Painters tape

First, I taped the paper down onto the floor.  Next, I drew a tree with a marker so he could see the lines.  *Remember! You don't have to be an artist to do this!  NO two trees are alike, and they are all beautiful, so have fun with your branches!!!! :D

Next, I let T-Man paint the tree!  He kept painting outside the lines, which normally I'm a huge fan of, but this time, we were going to cut out the tree, so he needed to paint inside the lines! lol!
He got the hang of it!  Encourage your kids to move around the paper as they paint so that they can reach all parts of the tree.
Not a bad looking tree!!!  After he went to bed last night, I cut the tree out, and used masking tape to adhere it to the playroom wall. 

This morning, he was SO excited to see his tree, that already had 2 leaves hung that he had made at school!  We, then, read this book, which talked about Thanksgiving day!
I tried to explain in further detail about what being thankful meant.  We talked about how we are thankful for the people and things that we really really loved.  I had him tell me what some of those things were, and we wrote them on his leaves!  We did 3, since we missed the first two days of the month, and we will do one a day for the rest of November!
I just love the things that he said he was thankful for! lol!!!!  And, he was so excited to put his leaves up on the tree! I can't wait to watch it grow and become so bright and colorful with all of the blessings that the Lord has given us! :D
If you make a Thankful Tree, please share a link in the comments below! I would love to see it! :D

Wednesday, September 11, 2013

Notebook Upcycle DIY

I must start by saying that this project was 100% inspired by my Mom!!!  A few weeks ago, in preparation for the beginning of Bible Study, Mom adorned the edge of each paper in her notebook with her gorgeous washi tapes!!!  The colors, the textures, the beauty...oh my!  I was in love :)  Kendall and I then had a girl night in which we shamelessly copied this idea on our own notebook.  Moment of truth: I stopped after about 30 pages, but mostly because we were watching Pitch Perfect :D


Today was our second week of Bible Study.  We are studying the book of Romans, and let me just tell ya, that is a good book! 

Since I had not finished the washi tape on my other notebook, I had decided to add it to my pages each week as a sort of book mark for the study.  I could hardly wait to get home to add my washi tapes when the idea hit me!  I could actually alter the cover!!!  *Now, this is where my Mom Brain is especially evident.  In previous years, this idea would have been at the forefront of my brain.  Now a days, I have to be reminded of seemingly routine and mundane tasks.  Kids.... ;)

Anyways, I set off to grab just a few colors and patterns that sparked my interest, and then set to work adding them to the cover!

This next picture is about half way through my process.  I will usually lay out some pieces and take a picture to see if I like it.  That way, if I move things around, I can at least remember where they were at one point ;)

And, Viola!  Complete!  I think I like it...for now :)  I'm sure as I stare at it through out the year, there will be some changes made, but that's one of the perks of mixed media!!!!

And, here is the washi tape on the pages inside!

This can be done on any surface!  Imagine how you can beautify all of your work materials now!!!  I know, I know, stop reading, and go make things beautiful!!!! :D

Sunday, August 18, 2013

Bookcase Upcycle

We moved!!! ...Physical homes, not blog spaces :)  Anyways, we bought this amazing house in a wonderful neighborhood, and we are just in love with putting everything together!!!  One of the coolest spots in the house is my studio!!!  A fourth bedroom was on our list of priorities while house hunting so that I could have a studio space, and this house did one better!

Off of the forth bedroom is a doorway that leads into a completely separate room!!!  It is a bit hidden, and everyone who has visited "oooooohs and ahhhhhhs" over this space!

The room is over the garage,  has vaulting ceilings, and this little gem:
Pretty bad, huh?!  My thoughts exactly!!!  Although I was pumped with the built in and the opportunity for a makeover, I continued to shudder at the color choice every time I entered the room!!!

As soon as I saw it, though, a Pinterest inspiration immediately jumped into my mind and has powered my transformation since!

Isn't she a beauty?!  The coral color was calling my name, and it took many coats of primer and paint to cover up that blue, but it was definitely worth it!!!

I really liked the clean color of the coral and white,
But I HAD to add the black!!!!  Up close, it looks very "animal print-ish," if that makes sense :)

So, there you have it!!! Transformed from fugly to fabulous!!! :)  I hope this inspires you to transform something in your own home!!!

Wednesday, April 17, 2013

Smash book pages

Things have been super busy around here!!! Yes, life with a baby and a toddler is pretty fast paced, but we are having a great time! In between laundry, dishes, bottles, feedings, naps, MDO, and play time, I try to find a few moments here and there to do something fun and creative!

Especially after I printed my Instagram pictures, I've been having a great time sticking them in my Smash books!!! I'm up to 3 of those bad boys, now!  My red one is for me and just random stuff, the teal one is Livie's baby book, and the black one is Tuckers, which started out as a way to help him learn Scriptures, but I'm adding in his stuff, too!

I found this little quote on Pinterest, and knew it was the perfect first page for his book!

These next two pages are probably my favorites right now!!! They are in my red book, and they are just so fun and colorful!...very me, no?! :)


This next piece is  not in a Smash book, but rather a card that I made and sent as part of a Love Notes project that I did! I mailed this little gem to Heidi, who was my pen pal for 3 weeks :)  I hope she liked it!


And, I'll leave you with this picture! I walked into Hobby Lobby a while back and this beauty smacked me in the face on the way in!!!  I think someone had me in mind when they made this couch!  How cute are those chevron pillows, too?! 

My dad, who never seizes to amaze me in his ever growing knowledge of girl things (he has lived most of his life in a house full of girls. We were bound to make an impact on him at some point! :), said, "You'd have to have everything else in that room be very plain in order for that couch to work!"  LOL!!! SO true, Dad!  Good eye, good eye. :)

Well, it's 9:45, so way past my bed time these days!  I hope you enjoyed this little update! :)

Tuesday, April 16, 2013

Recent Colors n Cups

I'm starting to jump back in to the swing of things now that Livie is over 2 months old!!! I have already done 3 Colors and Cups parties!  The first one was for my friend, Katie's little girl, Ava, who was turning 7!!!  We decided on a little owl painting for the girls to do, and they turned out just SO cute!!!

These little gals were absolutely perfect during our painting session!  They were so quiet, with the occasional be-bop to a Justin Beiber song playing in the background!  They were so attentive to instruction, and had a great time!!!

Miss Ava is quite the little artist, and her mom even displayed her own paintings that she had been working on at home!!!

Aren't these just the perfect little party favors?!!!

Last week I got to return to Elwood High School for 2 painting sessions with the teachers of the district!!! They voted on 2 paintings that they wanted to create, so on Tuesday we created the heart, and Wednesday we painting the Spring Trees!!!!

They turned out so beautifully!!!!

This year, I was given this super awesome contraption that projected my painting up on the screen while I painted.  It really helped with such a large group! ...plus I felt like I was fulfilling my dream of having my own art TV show ;)  ...You know I'd be so good at that! :D

Aren't those just such beautiful Happy Trees?! (Yes, we did talk about Bob Ross quite a bit during this class :)  Everyone did such a great job, and put such personal touches on their canvases!!! 

Email me if you are interested in booking a party this Spring!  You can check out all of the painting options HERE!

Wednesday, March 13, 2013

Printing Instagram Photos

I recently ran across this amazing tutorial during my Pinterest browsings that totally caught my eye!!! It said, "How to Print Instagram (or Square Photos) at Any Retail Photo Center" So, I traveled over to Ashley's page at Lil Blue Boo and read her amazing tutorial!!!

Instead of trying to create my own tutorial, I am just going to send you to her page!!! She has given such simple and clear instructions!!!

I will mention one thing, though.  When I uploaded my Instagram photos, none of the pixel sizes matched her charts.  They were either too big, or not listed.  So, being the complete math dummy that I am, I spent part of the afternoon trying to figure out in my mind how to adjust the math to get the correct pixels...

Then I had an "Ah, ha!" moment!!!!  DUH!!!

I first had to adjust the image size- so instead of using pixels, I used INCHES!!!!  (duh, right?!)

I changed the image size to 4x4 inches (since I would be printing a 4x6 picture), and the canvas size to 4x6.

Eureka!!! Problem solved!!!!   


I then proceeded to upload 77 photos!!! ...I had a little problem uploading to the site, so it repeated about 17 photos, so I was really at more like 60 :) ...that's better, right?!
I chose to use Wal*Mart because I have recently had some problems uploading to Sam's, which would have been cheaper.  But I think these would print almost anywhere!!!!
I was in heaven last night going through all of my printed out pictures, and immediately went to work!!!  Since I had received an amazing card from Mom yesterday, written to me on her brand new typewriter, I had to get it in my book!!!  I had so much fun!!!!


I hope you enjoy printing!!!  The only down side, is that I don't know how to do this if you don't have Photoshop or Photoshop Elements :/  But, I hope this helps!!!!

Monday, February 4, 2013

Silhouettes

I just had to share these pictures that my friend, Katie, sent me!!!  She has 3 adorable little boys, and we just finished this little project for her mantle!!!  I did her silhouettes on dark brown paper, and they look AMAZING in this room!!!  She said the boys love to look up at them and pick themselves out!
We came up with this idea after I had done these two for Brooks and Graham's room.  She has adorable Pottery Barn bedding, and we'll add Carter's once he's a little older!!! 
Like I said, just had to share!!!  If you're interested in having a silhouette made, please email me or leave me a comment!!!

Wednesday, January 30, 2013

Magpie

One of my Christmas presents this year from Big A was a very generous gift card to Anthropologie, which I used mostly on gorgeous new juice glasses and bowls.  However, with their after Christmas sale, many of their glorious goodies were marked very low, so I was able to treat myself!!!

I had seen these little kits during my many wanderings through their store before, but now I had a purpose for it!!!  I purchased a bright pink bird cage for Livie's nursery almost immediately after finding out she was a girl, but had yet to find a bird to make it a home.

Enter Donna Wilson and her Magpies!
These little kits come with everything you need to make your own little bird, and I actually think they're intended for children...perfect :)  I picked the box with the most pink in it!
I had a pretty good time stuffing it, and playing around with the scraps that came with it to make it as "me" as possible, which is the beauty of the kit!  There are no rules!!!!

So, I added pink to the orange side...
...and a ton of pink to the black side!!! 
She's just about done.  I still need to add her legs and tail, and she'll be good to go!!! Hopefully she'll be in her cage for the nursery photos!
Check out Donna's site! She's got just adorable products, and even a blog showing all of the Magpies and Monsters that people have created!