Monday, January 20, 2014

Instagrams

Here's just a few shots of what I've been up to lately!

I LOVE my studio!
Sketching before using my new Prismacolor markers!!!!
Mural in my friend, Courtney's, piano studio.  The evolution of the piano!
Still loving my planner!!! The organization, and the transformation! :)


Saturday, January 18, 2014

Pillow Time


A few years ago when my Father-in-law moved into his new home, he gave me a ton of vintage fabric that had been left behind!!!  I have been hanging on to them for the perfect project, and have really started using them a lot recently!!!

I really wanted to make a cute little pillow to add to the toy room, so I dug into my stash, and found this two little beauties...and some puffy ball trim...of course! :)
I put my fabrics right sides together, and then added the trim.  I'm not gonna lie, it took me a minute to remember that those little balls needed to face the inside so that they would be on the outside when I turned the fabric!!!  Lol, Mom brain!
Once they were pinned in, just a few zips of the sewing machine...
and a little stuffing!!!  I had this stuffing laying around from a previous project.  I didn't fill my pillow supper full, but firm enough that it would be comfy for tiny heads to lay on.
And, ta-da!!!!
The floral side is really my favorite.  I love all the pinks on it!!!  This project took me about 20-30 minutes.  It was quick and easy, and I love the odd shaped pillow in the room!!!  So, go make yourself a little  happy to lay your head on!

Monday, January 13, 2014

DIY Memory Game


My nephew just turned 3, and I really wanted to make him something fun, entertaining, and personal. 

Although my own childhood was slightly tainted by The Memory Game, because my older sister, who must have learned how to quickly figure out all of the cards...I'm still not exactly sure how she did it...beat me Every. Single. Time. I thought I might as well give the next generation a shot :)  So, here's what you'll need:

1. Instagram photos, or wallet size photos-2 of each picture. Click HERE to learn how to print your Instagrams!
2. Scrapbook paper
3. Matte board (I got mine at Hobby Lobby)
4. Ruler
5. Exacto Knife
6. Glue stick
7. Double sided adhesive tape- Big A suggested carpet tape for me!

*Just a little tip: Choose a simple, but fun pattern for your paper that won't make their eyes all crazy when the pieces are laying face down.  I was going to do a cute white paper with little black mustaches on it for Pax's game, until I realized I was getting a headache from looking at it! lol

Now, let's get started!
Cut out your photos, and then your Scrapbook paper to fit the size of the photos.  My Instagram prints ended up being 2.5 in.x 2.5 in. 

Next, cut your matte board.  On a cutting surface, like my cutting matte that I use for sewing, I measured and marked the matte board, and then whipped out my Exacto knife that hasn't seen much use since my college days.  Keep your ruler on your pencil line as a guide for your knife, otherwise your knife WILL run off the line! Those things have a mind of their own, and let's face it, you don't need to add blood to this project :)
Once all of your pieces are cut out, use your glue stick to glue your scrapbooking paper to one side of your matte board.
Next is where the heavy duty part comes in. I considered many ways to adhere the photos to the board so they wouldn't come off.  I was dealing with a "Board Book Destroyer," So I knew these bad boys had to be stuck on here for good!!!  Big A suggested Carpet tape.  (I really think he just wanted to go to Lowes and save himself from a trip to Hobby Lobby... :)  I will say, he made a good choice!  That stuff is sticky!!!
It took 2 strips to fill the area of the card, and a lot of cleaning goup off of my scissors :)
And, wha-la!  The pictures are holding on nicely to the matte board, and the game looks awesome!!!
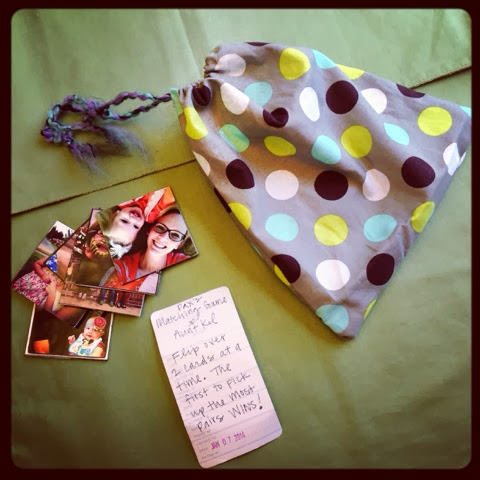
So, while getting ready for his party, I realized that I didn't have a box for his game, so I improvised, and whipped up a little bag for him from some extra fabric and yarn, and made a little instruction sheet!!!
This is a fun game to make for your toddler, especially to include photos of family members who live far away, or just fun, silly ones of your own family!!!  Enjoy!

Monday, January 6, 2014

New Year, New Goals

Happy New Year!!!  I'm usually not big on New Years Resolutions, mostly because my track record for following through with them is, well, not so great :)

I do, however, have a few projects that I'm pretty excited about!!!  The first one is this:
That's right, a planner!!! ...and appropriately labeled if you've been to our house :)  I decided that between doing school with T-Man, my Colors n Cups parties, murals, and just daily family life (not to mention the fact that my brain is completely not able to hold a thought longer than 3 seconds after having kids), I really needed to be organized!

And, of course, I had to make it fun!...and cute...and totally creative...with washi tape :)
I LOVE looking at my calendar, granted we're only 5 days into the year, but whatev!!!!  I've had a great time marking things off my lists, and being able to plan everything out!!!
I'll be posting my planner on Instagram under #diyplanner if you want to keep up!

My other little project, is to try to paint a little more.  I recently found the Daily Paintworks site, which gives you a weekly prompt.  I decided that I would really like to get back into just painting...not so much my mixed media stuff, but more just regular painting.  I haven't done a lot of strictly painting since college, so I thought this would be a fun challenge for me!

I started today with the Summer challenge.  Instead of painting the suggested picture, I decided on using my own photo instead- one of Tucker on the beach at Destin this summer.
It's not my absolute favorite by any means, but it was a good start to the project.  And, you'll see a theme with me that I most likely will not be painting faces :)

What are some of your goals?!